

This blog post contains affiliate links. As an Amazon Associate I earn from qualifying purchases. When you click and make a purchase through the links on this blog, I earn a commission. Additionally, all opinions given in this blog are my own. Please read our full disclosure here.
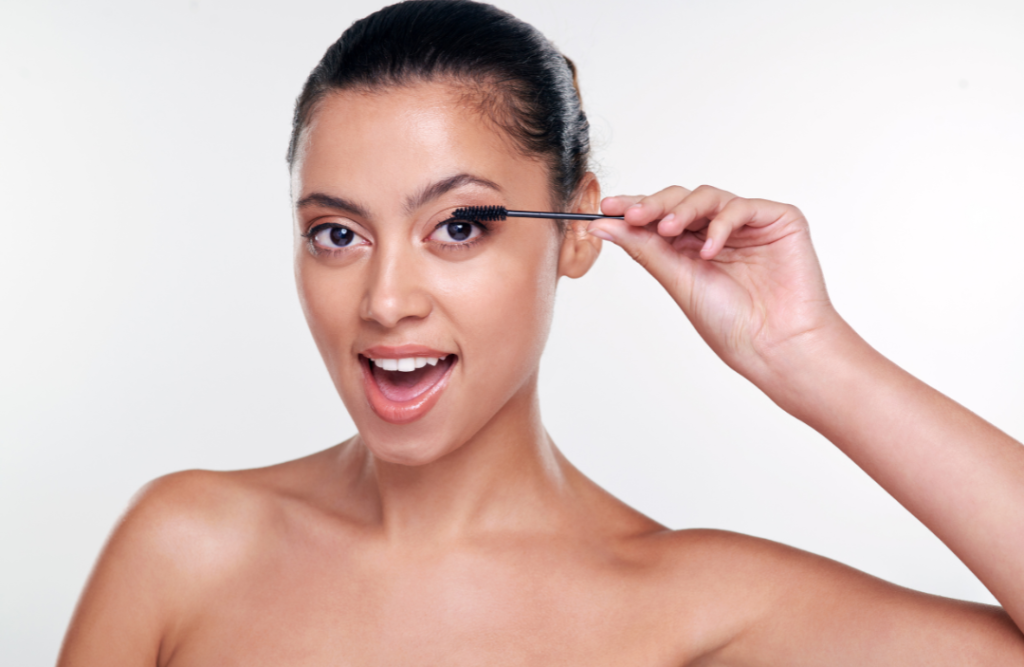
If your lashes are straight, stubborn, and refuse to hold a curl, I get it. That’s exactly why I tried doing a lash lift at home.
And yes… it worked.
However, there are a few things no one really tells you, especially what happens about seven to fourteen days later.
In this post, I’m breaking down:
- First, my real results
- Next, what went wrong
- In addition, what I’d do differently next time
- Finally, tips to make your first lash lift way easier
Quick Results (Before You Commit)
- Results lasted: ~6–8 weeks
- Curl level: Strong (almost too strong at one point)
- Difficulty: Medium (some frustrating steps)
- Would I do it again? I would do it again, but I’d approach it differently next time around
- Biggest mistake: Lash placement + overprocessing
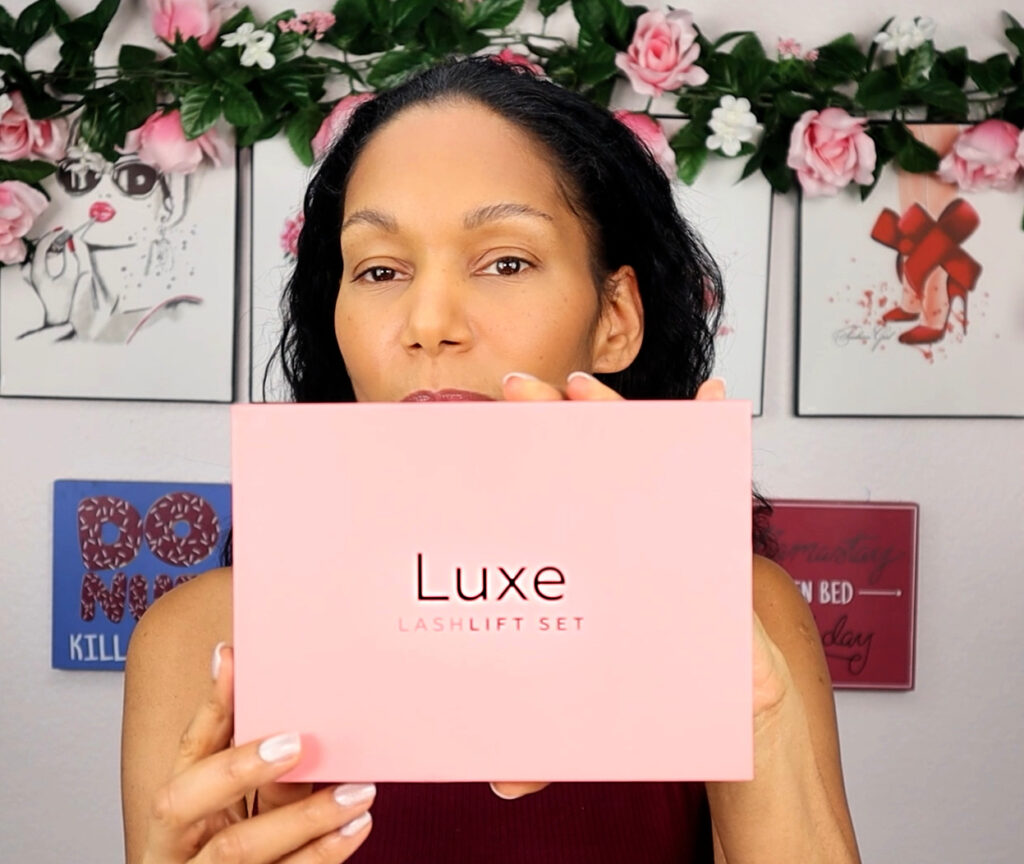
Which Lash Lift Kit to Choose
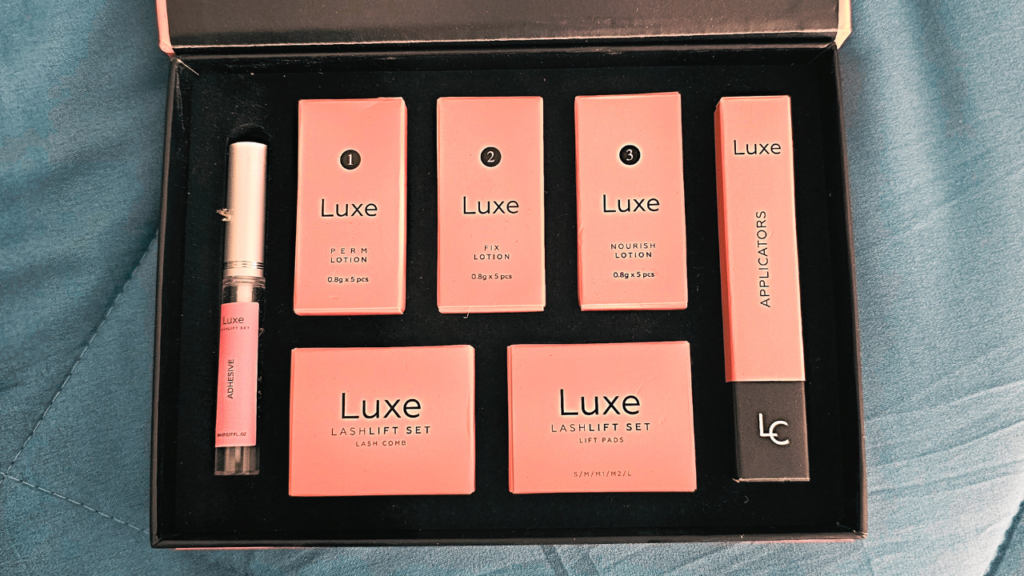
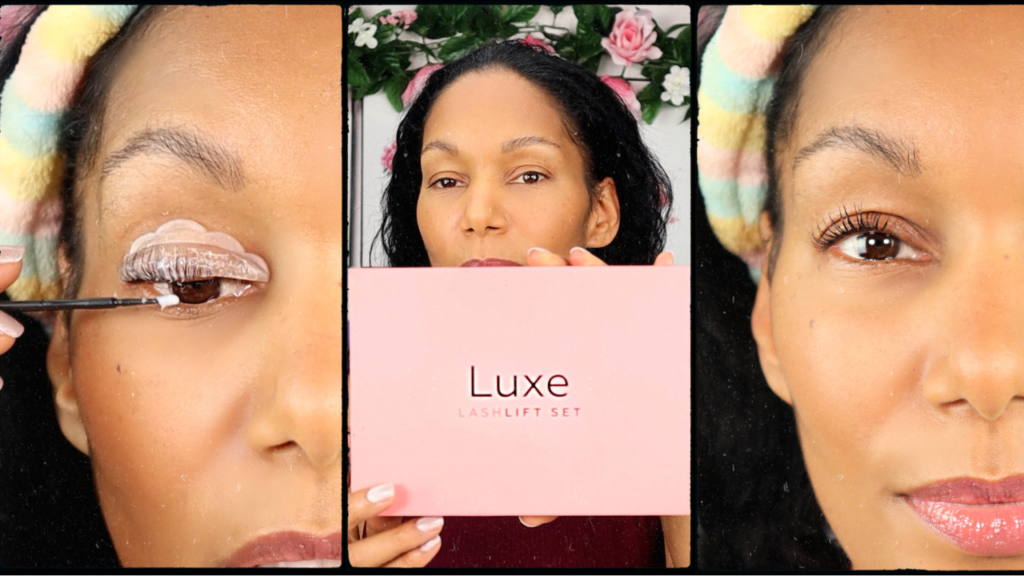
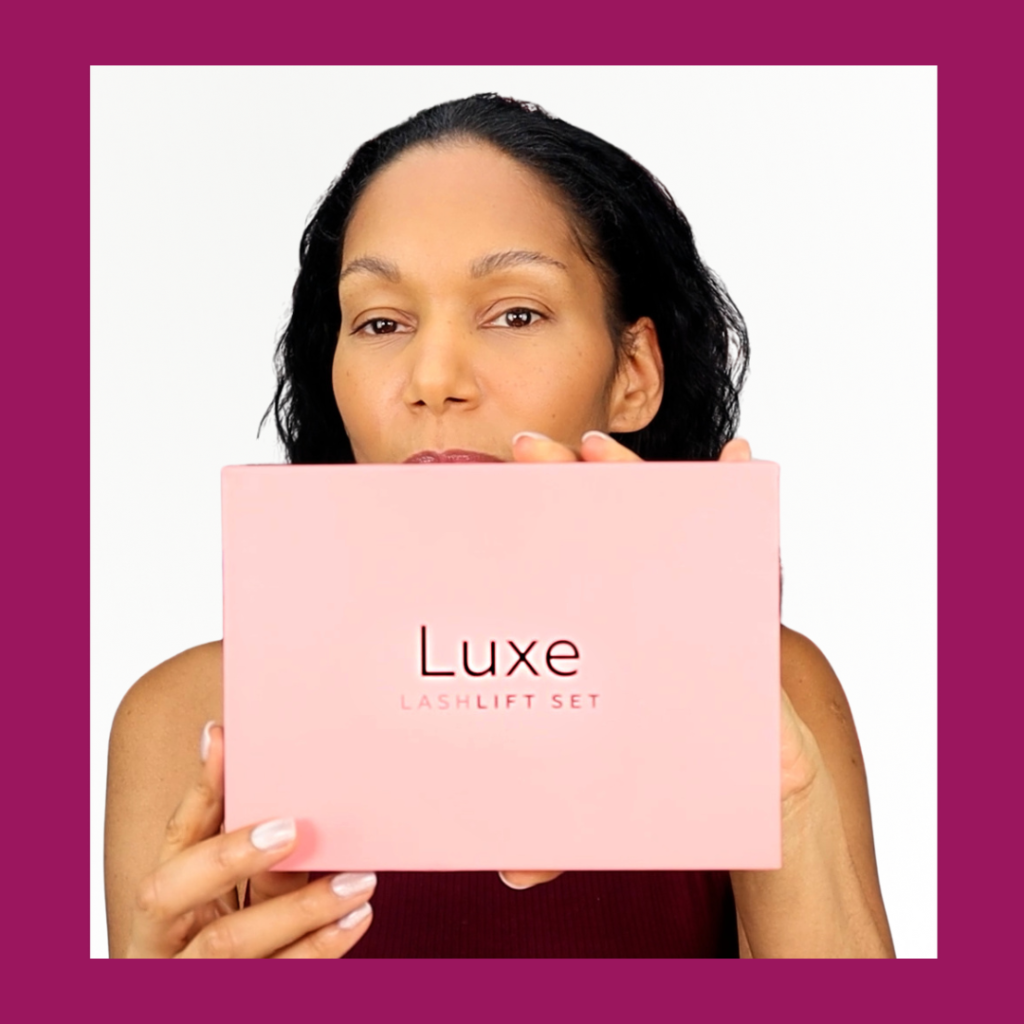
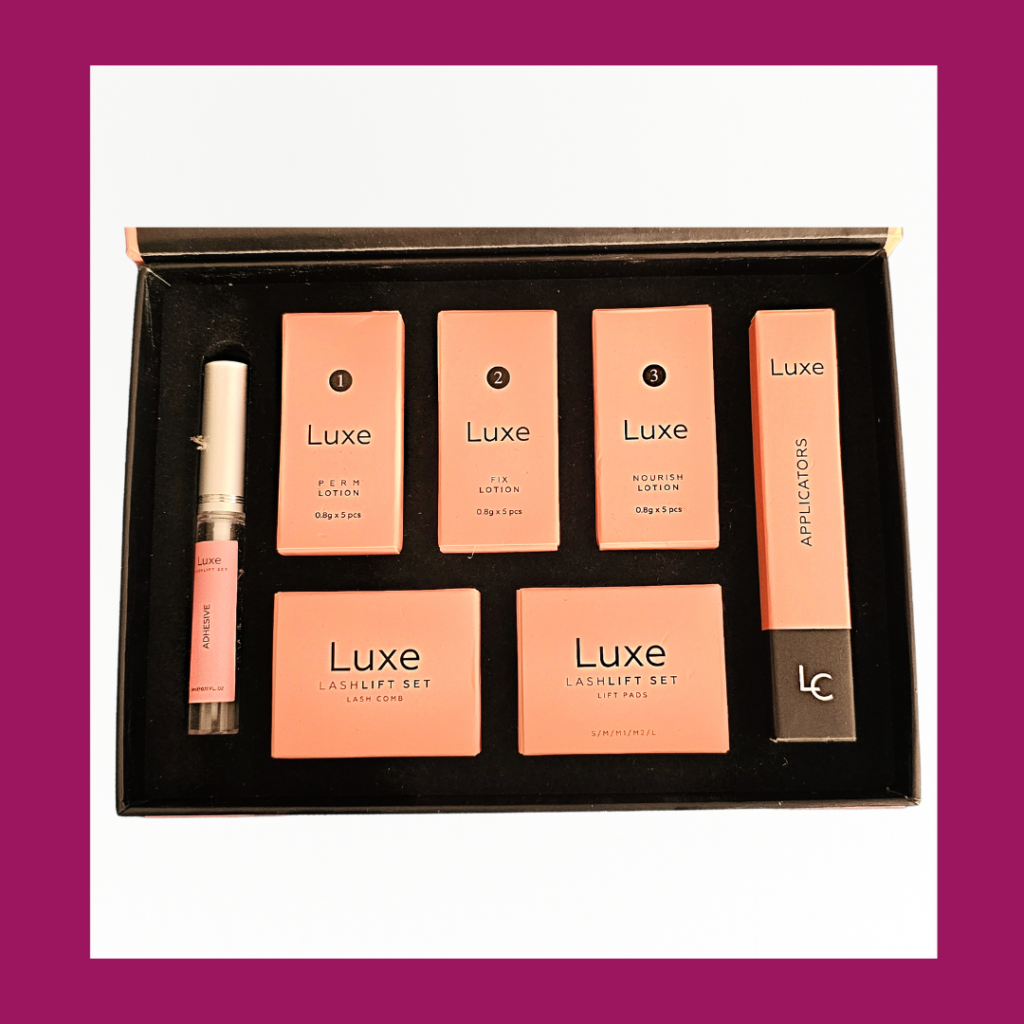
After researching and watching tons of before-and-afters, I chose the Luxe Cosmetics Lash Lift Kit.
It comes with:
- multiple treatment packets (so you can reuse it)
- step-by-step instructions
- all tools included
👉 Overall, there is no need to pay $80–$120 at a salon to get lifted lashes. Using the kit is definitely more budget-friendly.
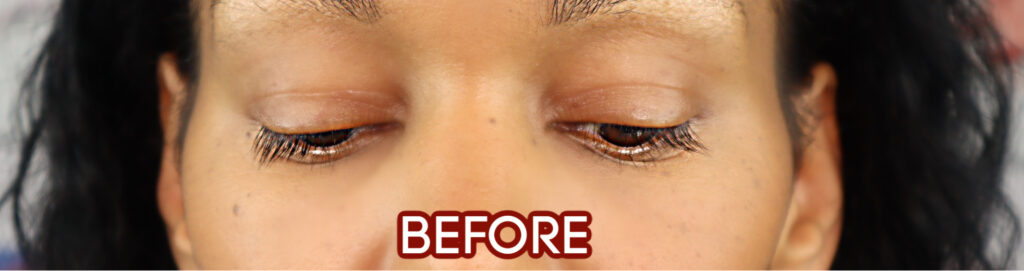
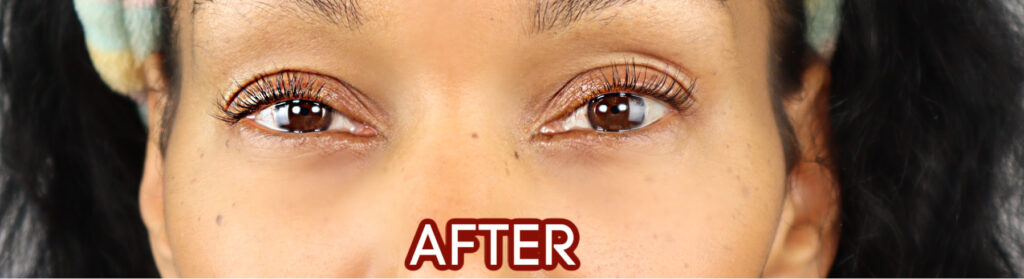
My Results (What to Expect)

Immediately After
Right after finishing, my lashes were:
- lifted upward
- noticeably curled
- looked longer without mascara
As a result, I actually stopped using my lash curler completely. In fact, my lashes still looked beautifully curled when I woke up the next morning.
Weeks Later (What No One Tells You)
A few weeks later, I noticed a few changes:
- Some lashes had curled too much
- Others stayed straight
- A few started going in different directions
Because of this, it became harder to:
- apply eyeliner smoothly
- apply mascara (it started looking clumpy)
- keep everything looking neat
However, this wasn’t necessarily an issue with the kit itself — it had more to do with technique, especially since this was my first time doing a lash lift.
The DIY Lash Lift Step-by-Step
Step 1 – Choose the right size lash Pad
The thicker the pad, the more dramatic the curl.
For my lashes specifically, I chose an M-curl pad because I wanted a bold, lifted look — and it definitely delivered.
Step 2 – Adhere the lash pad to your upper eyelid
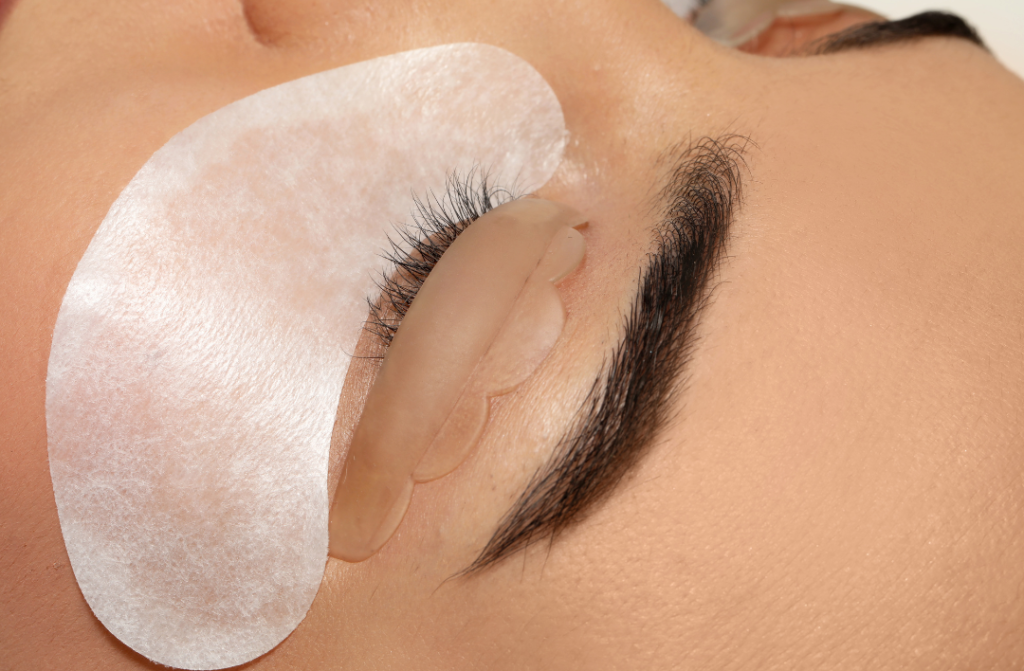
This was the most frustrating part of the process. The main problem was that the lash pad didn’t stick well enough.
To fix this, I added a small amount of adhesive to the back of the pad.
👉 If this step isn’t secure, everything that follows becomes much harder.
Step 3 – Stick your lashes to the silicone pad
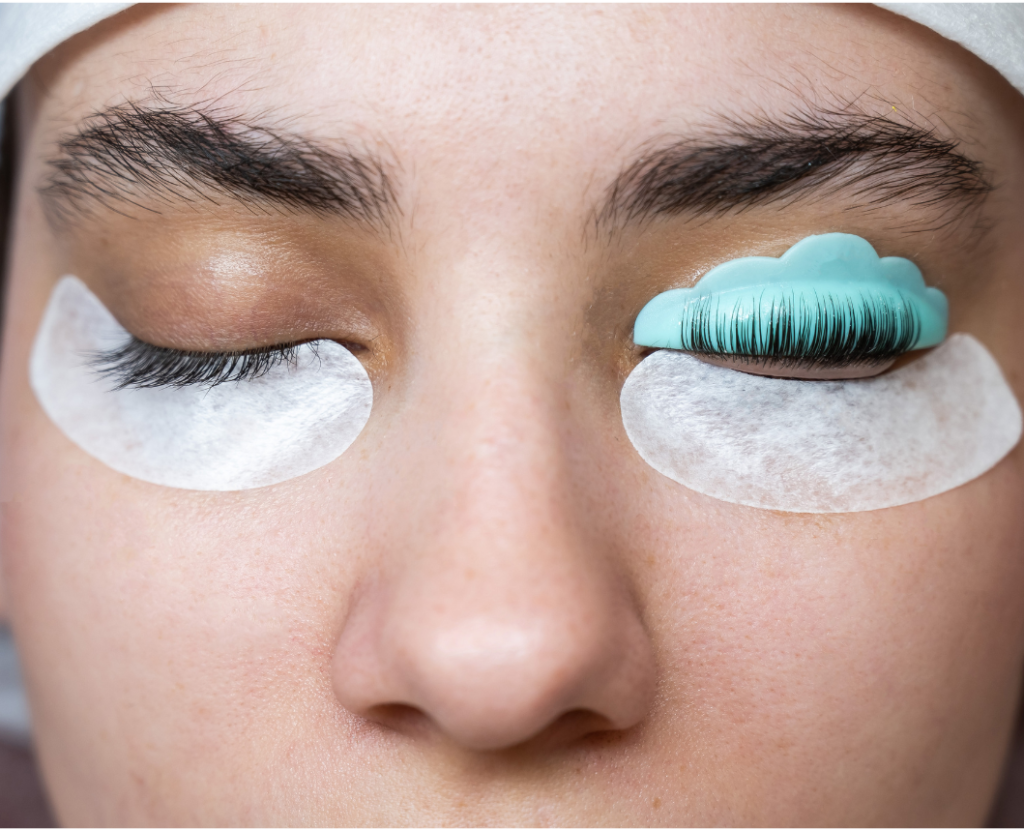
To get the best outcome, it’s important to:
- Spread lashes evenly
- Avoid crossing or clumping
- Take your time during placement
👉 Ultimately, uneven placement leads to an uneven curl later on.
Thinking of getting your brows groomed? Check out “The Brow Lamination Diaries: Before and After – My Brow Makeover Unveiled”
Step 4 – Apply the Perm Lotion
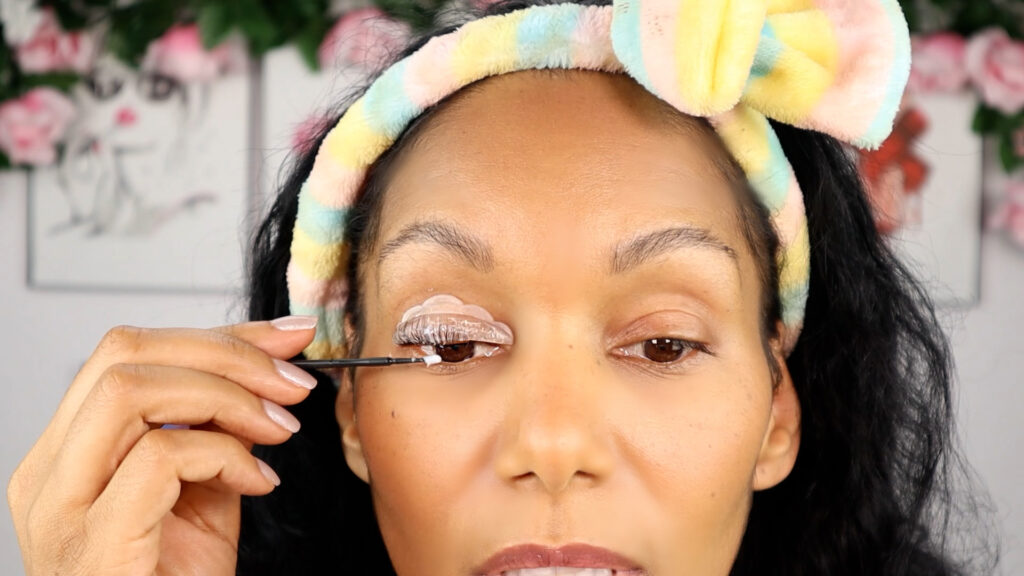
- Avoid applying product to the lash tips
- Leave it on for about 10 minutes (not 15 — learn from me)
👉 As a result, you avoid overprocessing, which can lead to overly curly lashes later on.
Step 5- Apply the Fix Lotion
- same process as perm lotion — this step locks in the curl
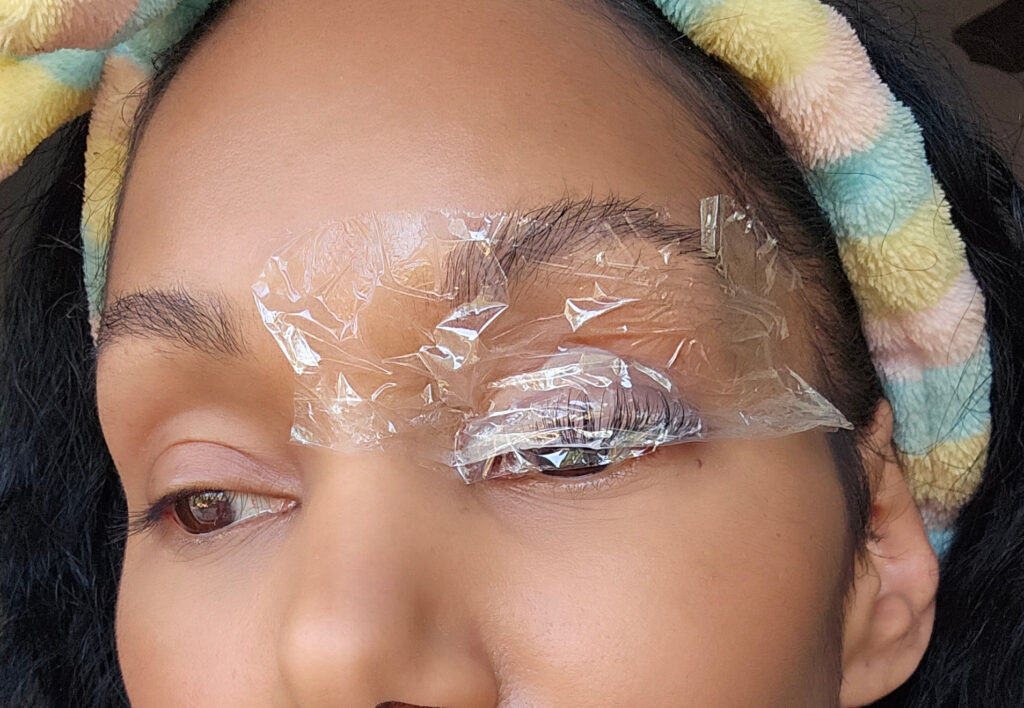
Step 6 – Remove the Silicone Pad
- This part is easy — it comes off without much effort.
Step 7 – Apply the Nourishing Lotion
Initially, I used the included nourishing lotion. After it ran out, I switched to castor oil instead.
As a result, this helps keep the lashes healthy after the treatment.
Click below to Watch my YouTube video about my Lash Lift at Home
How to Care For Your Lashes After a lash lift at home
To make your results last after using the Luxe Cosmetics Lash Lift Kit, follow these aftercare tips:
- First, keep lashes dry for 24–48 hours
- Additionally, avoid touching or rubbing them
- If possible, sleep on your back
- Avoid oil-based products near the eye area
- Finally, brush your lashes daily
👉 Overall, aftercare makes a big difference in how long your results last.
Common Mistakes (Learn From Me)
- Not securing the lash pad properly
- Rushing lash placement
- Leaving perm solution on too long
- Expecting perfect results the first time
How I Fixed Over-Curled Lashes
When my lashes got too curly, I:
- applied perm lotion lightly to the opposite side
- left it on for 1–2 minutes
- followed with fix lotion
👉 This helped relax the curl and made them look more natural again.
Conclusion
If you’re thinking about trying a DIY lash lift — I say go for it.
Even with the learning curve, I loved:
- the lifted look
- not needing a lash curler
- how it enhanced my natural lashes
And honestly? Even when things got a little messy weeks later…
they still looked better than my natural straight lashes.
Next time, I know exactly what to do differently — and I’m expecting even better results.
Have You Tried a Lash Lift?
Would you try this at home or go to a salon instead?
Let me know — I’m curious 👀


Wow, the results are great! Your lashes look amazing and thank you for your descriptions because it really helps with seeing what you are talking about when being careful about applying the lash pad, etc.
I couldn’t agree more! DIY lash lifts are a game-changer, and once you see the results, you’ll be hooked. It’s great to hear that the Luxe Cosmetics Lash Lift kit was helpful, especially with its easy-to-follow instructions and video guide. I’m definitely tempted to try it out myself after hearing about your experience. Plus, it’s always nice to share tips and experiences in this lash-loving community. Thanks for sharing!
I keep seeing ads for this product all over my Instagram and have been wondering if I should just get it. You’ve convinced me – the results were gorgeous!
Wowo…. impressive lovely beautiful with the lashes on you. Thanks for sharing your own experience of having the lashes before & after. Looks really nice. Cheers SiennyLovesDrawing
I was skeptical at first. I was so sure my lashes would droop downy after day one…. They didn’t though. Now I’m hooked.
I can tell from your photos that I need to try this! My lashes have always been lackluster, and this looks like it does a great job!
Wow what a difference this makes! I would never have considered a diy lash lift at home before reading this article. You’ve really made it seem doable and the results are great!
I just read your post on Kimberly Worldwide about your first attempt at a lash lift at home, and I must say, it’s both informative and inspiring! Your detailed walkthrough of the process, along with your personal insights and tips, provides valuable guidance for anyone looking to try it themselves. Your candid account of what to expect, including the challenges and successes you encountered, adds authenticity and relatability to the narrative. It’s evident that you approached the experience with both excitement and caution, and your willingness to share both the highs and lows is commendable. By sharing your journey, you’re empowering others to explore DIY beauty treatments while also encouraging them to embrace the learning curve that comes with it. Keep up the fantastic work of sharing your beauty adventures – I’m sure many readers will find your insights helpful and inspiring! 💁♀️✨👁️
Thanks so much for your kind words. I love writing so hearing you say this means so much. Made me smile (btw… love your name LOL)
This looks like a lengthy process that needs lots of patience, But I guess all good things come with a price and to get such beautiful results it’s worth the effort.
Well, as a man I’ve never done anything like this, but bet my prior girlfriends and the late wife would love it. Thanks for all the details.
Oh, that is seriously a cool kit! However, I think that step that you had trouble with would definitely trip me up!
And although that lash pad was a bit of a hassle, I recently gave myself another lash lift. I just love the way it opens my eyes even when not wearing any makeup.
They look great. I’ve never worn lashes but I have many students who do and they look great. A lift might be a better idea for me.
Thanks for trying, and sharing this experience with us. I suppose it’s very helpful for the women population 🙂
This is a really great tutorial on how to do a lash lift at home . You have achieved great results . Looking great.
I have never tried a lash lift – let alone at home. It looks like it is a little on the tricky side, but worth it if you get results that make you feel good. My lashes could do with a bit of oomph!
Thanks for sharing the detailed process of it, as I keep seeing ads for it but was unsure how it worked. You had great results!
I’ve heard about this and I’m very intrigued with it. Thanks for sharing your experience with this product.
I would like to try this lash lift at home. Mine are so short and they look so sad and limp! This kit sounds good to me.
The lift on its own makes lashes look longer instantly. I was pleasantly surprised. Go for it! You’ll love it.
I love the step simplicity and the results are gorgeous! I’ll have to get this for my daughter.
The author’s humorous reference to the saying “You don’t know what you had until it’s gone” adds a touch of wit to the narrative, underscoring the disappointment of seeing their lashes return to their natural state. The anticipation for a second round of DIY lash lifting resonates with readers who may have experienced similar beauty trials and tribulations. Overall, it’s a lighthearted and engaging read that navigates the ups and downs of beauty experimentation with authenticity and humor
I’ve been seeing these all over Tiktok recently and I’ve been soooo tempted! The difference is unreal! I’m not a fan of false lashes or extensions so I think this is definitely something more for me. Looks fab!
Although lash xtensions look great, they are a lot of upkeep. With a lash lift, that is not the case. It’s super convenient since you’re still dealing with your own lashes.
I honestly have never heard of this sort of thing before – but it really had results!
I want to try this łash kit. Steps are pretty easy and I can see the difference.